Growing kale is one of the best ways to enjoy fresh, nutritious greens throughout the year from home. It is a very hardy, leafy plant with an abundance of vitamins, minerals, and antioxidants. In fact, it has become the favorite plant among health-conscious gardeners. Whether your backyard is large enough or you are residing in a small apartment, you will find that this plant thrives pretty well in almost every space.
This is a cool-season crop regarding both indoors and outdoors. Given proper care, the plant produces succulent green leaves on containers or a raised bed, hydroponic system, for example. Probably the best reward that one gets from cultivating kale indoors from home is the control one gets on the environment, a pesticide-free one, organic all of the produce that one’s home produces. Third, kale thrives, not requiring much toil involved in growing one around.
You will need high-quality seeds or seedlings, rich soil, and a pot that allows for proper drainage. Proper light whether it be sunlight or grow lights would allow it to grow to its optimal potential. Regular watering, along with infrequent feeding using organic fertilizer, should keep your kale well-maintained.
You actually save money and enjoy satisfaction from cultivating your very own fresh, flavorful greens-a perfect addition to a healthy lifestyle-by growing kale at home.
Choosing variety.
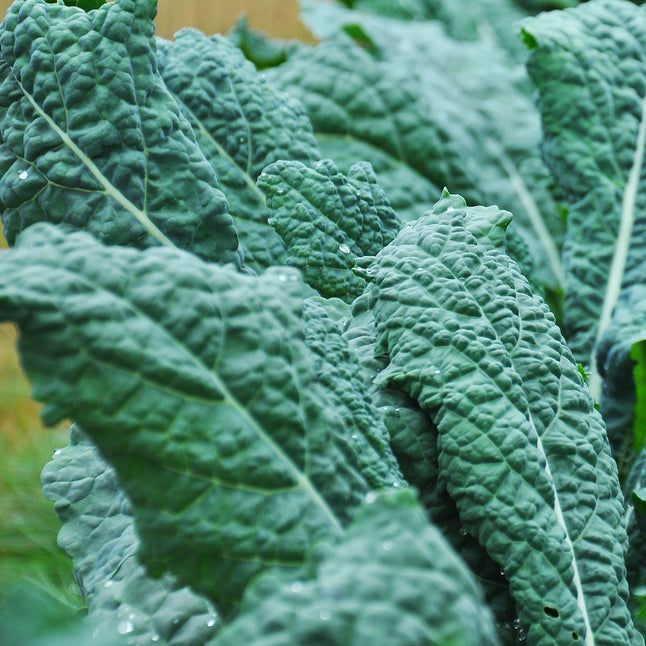
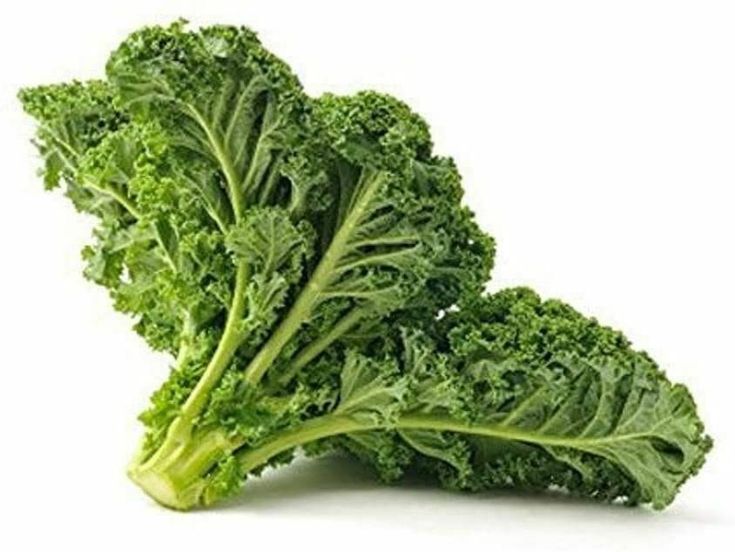
There is an incredibly wide range of kale types to fit every taste, with leaves that are smooth, curly, or intricately frilled and come in long, slender shapes or more broad and deeply lobed. The colors range from bright greens to deep purple-red. The Cavolo Nero, or Black Tuscan, is a favorite; however, there are countless other exceptional varieties that can introduce diversity to your garden, borders, and plates. It has varieties that provide unique textures and flavors, meaning that there is always the right kale for your veggie patch and plate.
Preparing the Ground
Kale grows well in nutrient-rich, well-drained, and firm soil, although it can tolerate a range of soil types and conditions. It prefers full sun but will grow well in partial shade.
Before planting, clear away all weeds and enrich the soil with well-rotted manure or garden compost. After amending, rake the soil until it is even and compact it to create a stable foundation for planting.
Sowing
Kale is started in a seedbed away from the main vegetable bed and spaced out in the garden later. This saves the precious ground when this crop grows very slowly and lets the best ground be kept free for other crops. Direct seeding in the final place may also be allowed in order to bypass transplanting.
There is another method, sowing kale indoors where the seedlings can then be transplanted directly into the permanent location.
Most varieties of kale get pretty large so do require quite a lot of space. Compact dwarf types make better choices for small plots and the young kale plant which is used for salad cropping does not need a great deal of space to fit.
Sowing indoors
As an early sowing, grow kale under cover in mid-spring. Fill a modular tray with multi-purpose compost and water it well. Plant two seeds per module, making a 1cm deep hole, and cover over with compost. If both seedlings come up, remove the weaker one.
Plant the young kale seedlings outdoors when they are large enough to handle, after hardening them off to acclimate to outdoor conditions (see below).
Sowing outdoors.
Sowing kale outdoors can be done easily and is very rewarding. Choose a sunny spot where the soil is well drained and fertile. Loosen the soil and enrich it by adding compost. Sow seeds ¼ to ½ inch deep, with gaps of 4–6 inches between each seed in rows 12–18 inches apart from one another. Keep the soil moist constantly until germination starts. Thin seedlings to gaps of 12–18 inches apart when they reach heights of 3–4 inches for proper growth. Kale prefers cooler temperatures. Sow in early spring or late summer. Mulch will be helpful in retaining moisture as well as suppressing weeds. Regular watering and pest monitoring result in healthy plants, which provide months’ worth of nutritious harvests.
Transplanting

Transplanting kale is a wonderful way to give your plants a strong start. Start with seedlings that have been hardened off for 7–10 days. Provide the soil with plenty of sunlight, excellent drainage, and fertile soil filled with compost. Dig holes just a little larger than the root balls and plant them at least 12–18 inches apart. Take care in lifting seedlings out of their pots, keeping roots intact. Plant them at the depth that they were at. Tamp the soil down to anchor roots; give thorough watering and mulching for good retention of moisture. Caring daily will ensure great and strong healthy growth.
Plant Care
Provide consistent watering, sunlight, nutrient-rich soil, regular weeding, mulching, pest monitoring, and occasional feeding for healthy plant growth.
Watering
Kale needs consistent watering, about 1–1.5 inches per week. Water deeply at the base to encourage strong roots. Avoid overhead watering as it may cause diseases. Mulch retains moisture, reduces evaporation, and keeps the soil evenly hydrated.
Mulching
Mulching kale helps to retain soil moisture, regulate temperature, and suppress weeds. A 2–3 inch layer of organic mulch applied around the base of plants such as straw, shredded leaves, or compost will prevent soil splashing, reducing the risk of disease and improving growth.
Feeding
Kale thrives with regular feeding to support leafy growth. Use a nitrogen-rich fertilizer or apply compost every 4–6 weeks. Side-dress plants with organic matter to boost nutrients, ensuring consistent growth, vibrant leaves, and a bountiful harvest throughout the growing season.
Weeding
Weed regularly around kale to prevent competition for nutrients and water. Hand-pull weeds carefully to avoid disturbing shallow roots. Applying mulch reduces weed growth, making maintenance easier and promoting healthy, unobstructed kale development.
Harvesting

Harvest kale when the outer leaves are large enough to eat, usually 55–75 days after planting. For baby kale, pick young, tender leaves early in the growing season. Harvest by cutting the outer leaves, leaving the central growing point intact to allow for continued growth. Kale can be harvested multiple times, with new leaves sprouting regularly. Harvest before severe cold or frost to preserve quality and flavor.
Problems
Kale is prone to several pests like aphids, cabbage worms, and flea beetles that may attack leaves. It may also have some diseases such as downy mildew, powdery mildew, or clubroot. Poor soil, overcrowding, and irregular watering will make the growth stunt and lower the yield.